Tips on mosquito photography continued!
Hi all,
Over the last several months this project has more than doubled, now 91 observations and growing! Great work everyone!
Meanwhile, here are a few iPhone photography tips, and in addition to my earlier post on this topic (read here: http://www.inaturalist.org/projects/mosquitoes-in-hawaii/journal/4264-many-ways-to-take-macro-photographs-with-your-smartphone) there are a few camera basics that can really help take an identifiable photograph of mosquitoes.
Assuming you are using an iPhone (users of other phones please leave some tips in the comments below) there are three basic steps to taking an identifiable mosquito picture even if you don't have an additional magnifying lens:
- focus
- exposure
- zoom
First up is finding and locking your minimum focus. Start by opening your camera application and finding a likely test target to work with. A coin will do. Move the lens close to the target and notice it continually refocuses automatically. This automatic focus can occasionally help , but for a macro shot it just creates one more variable you do not want to deal with. Bring it so close that it is struggling and failing to find the focus, then slow back up until it can focus clearly on the coin, now here is the trick: push your finger on the screen right on top of the image of the coin and hold until it snaps into focus. This should show the focus square bouncing into focus with a repeated snapping motion. Congrats you have just locked your focus!
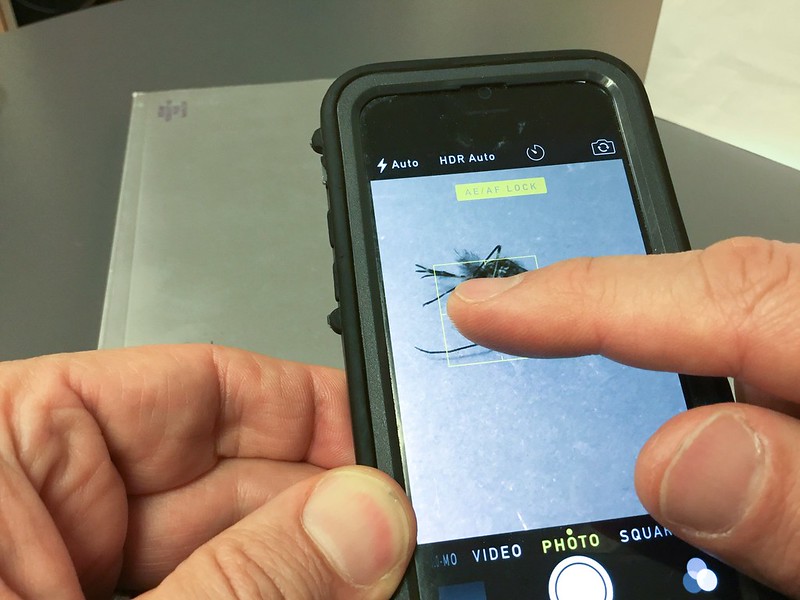
Now we will adjust the exposure. After focus lock, you can simply rub your finger up or down the screen to brighten or darken the picture. It is that easy. This is really useful because the way a camera meter works is that it evaluates the scene, assumes it is a medium tone (technically 18% gray) and adjusts the exposure accordingly to produce 18% gray. This is why, when you take a photo of a snowy scene or a white piece of paper, it can come out too dark. To make it white you have to make it brighter, so run your finger up the screen until white is closer to white and the subject is well exposed! Note, it helps to use a bright light to illuminate the specimen (flashlight, desk-lamp, sunlight) and don't use the flash, so turn that off.
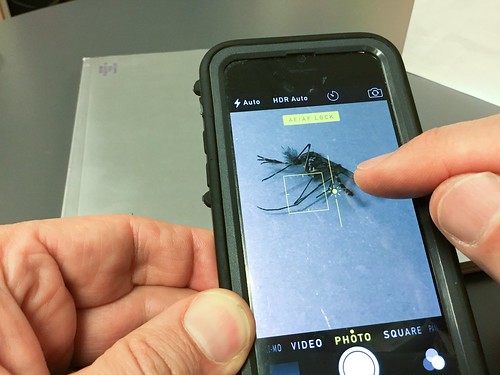
The last step is to zoom & shoot! To zoom in use the opposite of the "pinch" motion and put your fingers on the screen and spread them out. You can also simply run your finger across the zoom slider at the bottom of the screen. Zoom to about 50%.
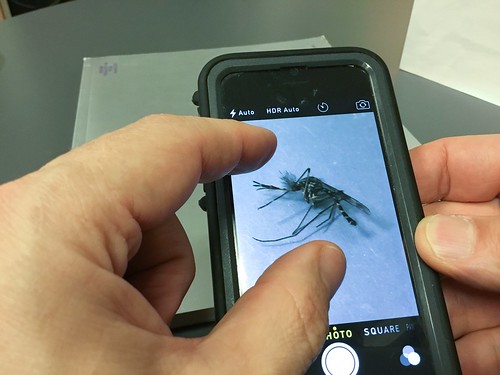
Now you are ready to take your photo! Assuming you have a mosquito specimen on a white or medium gray piece of paper now with the focused locked, move the smart phone back and forth to get the key characteristics into focus. Take multiple pictures, adjust the brightness, use a tweezers, toothpick or pencil to push your mosquito over add another angle and upload your best photos, don't be shy, upload photos of the following areas: thorax / scutum. Head, antennae and proboscis. Side-view with the legs showing. A habitat shot, larvae or other interesting angles.
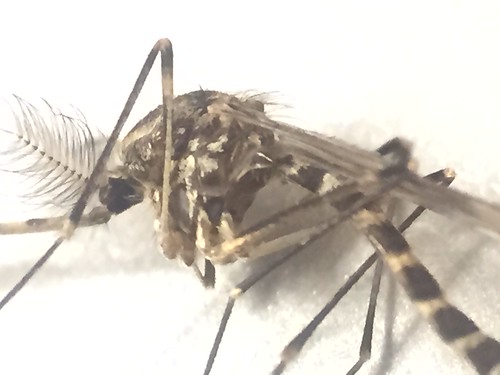
Culex pipiens side view.
Have fun with the photography part. Making sure that you've shown identifiable characteristics will really add value to your record and ensure that it is a lasting source of information for the future.
Durrell


Comments
For new tips from Matt, see his guest post: guest-post-from-matt-member-waimeamiddleschool.
Add a Comment